Thursday, January 7, 2010

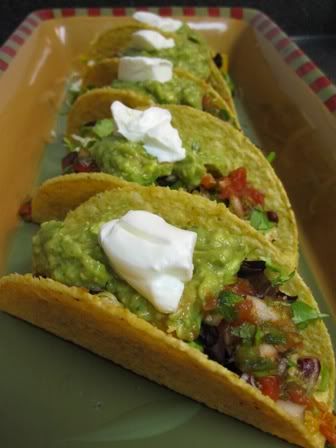
Acorn Squash Tacos


In the mood for a healthy and quick dinner the other night, I looked over my favorite orange metal colander with carrot-shaped cutouts that sits on my counter and holds produce that doesn't go in the fridge, selected a few items (with some more help from the fridge produce), and whipped up some quick vegetarian tacos. Run Lori Run! asked for more veggie meals, and I'm only too happy to oblige (and go check out her adorable creations!).
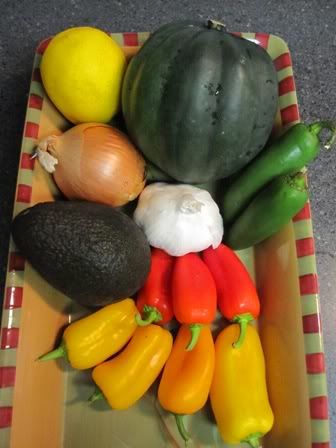

First up, the acorn squash. Oh how I love funny looking foods! Acorn squash is a hard winter squash, a good source of dietary fiber and potassium, as well as vitamin C. And it looks like a big green (or gold, depending on the variety) acorn.

Chop it in half...
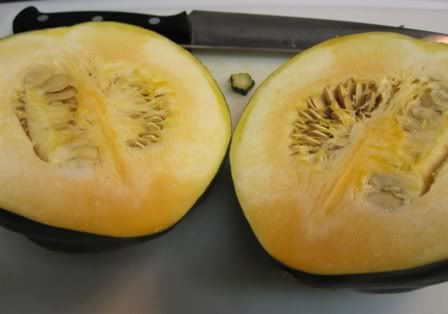

Scoop out the seeds, and chop the halves in half, horizontally. Or vertically, it probably doesn't matter. (Looking at the quarters from above, I kept seeing synchronized swimmers. Don't know why, but now acorn squash will always make me think of water ballet.)
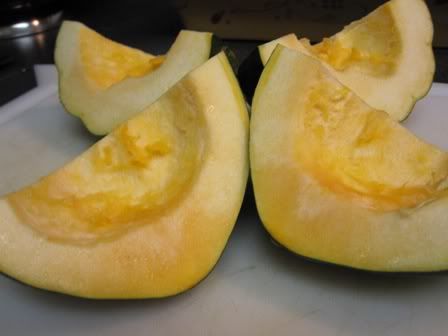

Squash is often baked, but I was going for quick this time around. Put the quarters in a microwaveable dish and add 1/4 cup of water. Cover with plastic wrap and nuke for 8 to 10 minutes, until soft.
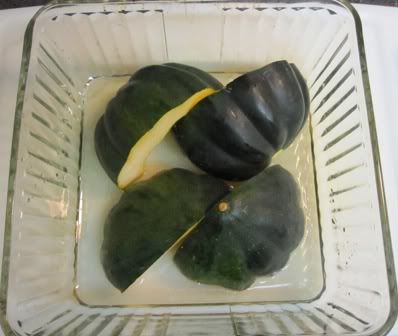

While the squash is cooking, take a pepper (or a handful of mini peppers, as I had on hand) ...
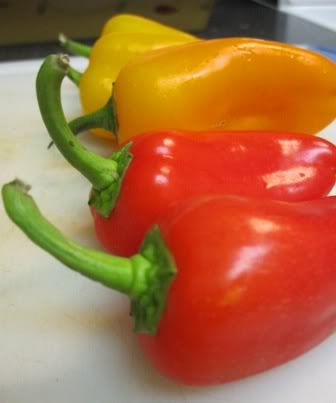

... and slice into strips.
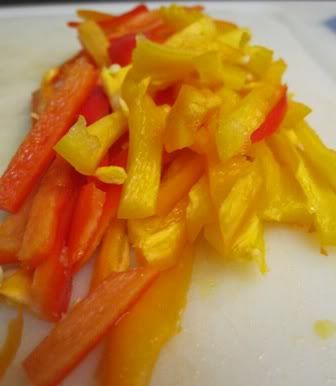

Now the interesting part. When the squash is done, its gonna be hot! The flesh is quite soft (and tasty!), but you have to get it off of the rind. I scored each quarter like a mango and used my knife to inelegantly slice the squash away. I'm sure there's a better method, and if you know it, let me know in the comments!
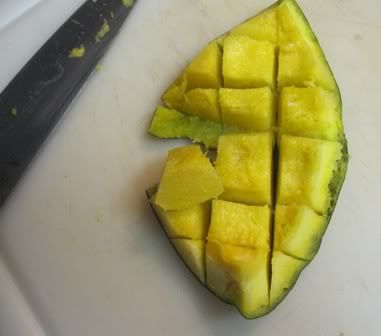

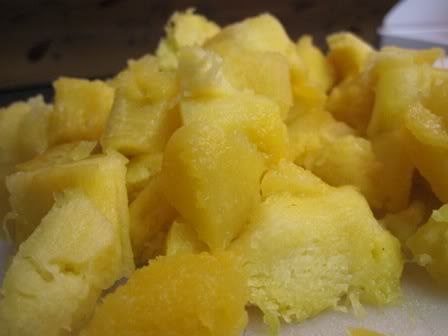
However you slice it, you end up with a pile of squash-y (squash-ed?) goodness.

Heat a glug or so of olive oil in a skillet. When hot, add some minced garlic and onion, if that tickles your pickle (I added half a jalapeno pepper, minced), the sliced peppers, the kinda-cubed squash, and a can of kidney beans for extra protein (previously rinsed and drained, of course). Any spices you like, such as cumin or chili powder or Taco seasoning, are good here too.
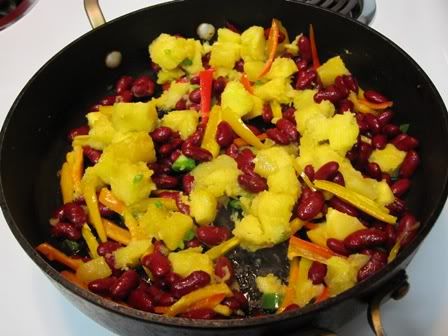

Cook this up, stirring occasionally, for about 10 minutes or until everything is good and hot. While its cooking you can whip up some fresh salsa and guacamole if you like: In a food processor, add a can of Mexican-style stewed tomatoes with juice, however many minced jalapenos your taste buds can handle, a chopped onion, a couple of cloves of minced garlic, half a bunch of cilantro, the juice of half a lemon or lime, and some salt and pepper. Process until everything is chopped up, but still chunky... basically until it looks like salsa and transfer to a bowl. Reserve a little salsa in the processor, add in a chopped avocado or two, and process again for guacamole. Simple!
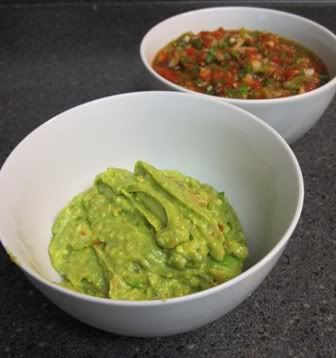

Then assemble your tacos. I had some Old El Paso Stand 'n Stuff taco shells on hand from buying them at the market on a whim, and they are convenient. I would suggest using a harder shell (bought or homemade) for these tacos since the squash is soft, so you have some contrast in the textures. But cooking is all about experimentation, so knock your own socks off!

I put some of the taco mixture in the bottom, topped with a mix of shredded sharp and extra-sharp white cheddar cheeses, then shredded lettuces, then salsa and guacamole. And on the very top... that isn't sour cream, but plain yogurt. I always have a ton of plain yogurt around (and if you own a bulldog, you may know why) and usually use it in place of sour cream for most things. Its better for you and you still get that tangy taste.

I love the little fallen-over guy on the right there!

So, I don't have a written recipe for this, because its tacos. Add in whatever you want, and if you have tons of leftovers the filling is great for a taco salad the next day (or burritos, or more tacos...). But I hope this gives you non-veggie-eaters out there a little incentive to try a non-traditional taco filler. My resident carnivore loved them!

Monday, January 4, 2010

Quick Holiday Recap


There was romping in the snow.


There was snuggling up on the couch.


And always looking ahead to a hopefully beautiful new year.

Sunday, January 3, 2010

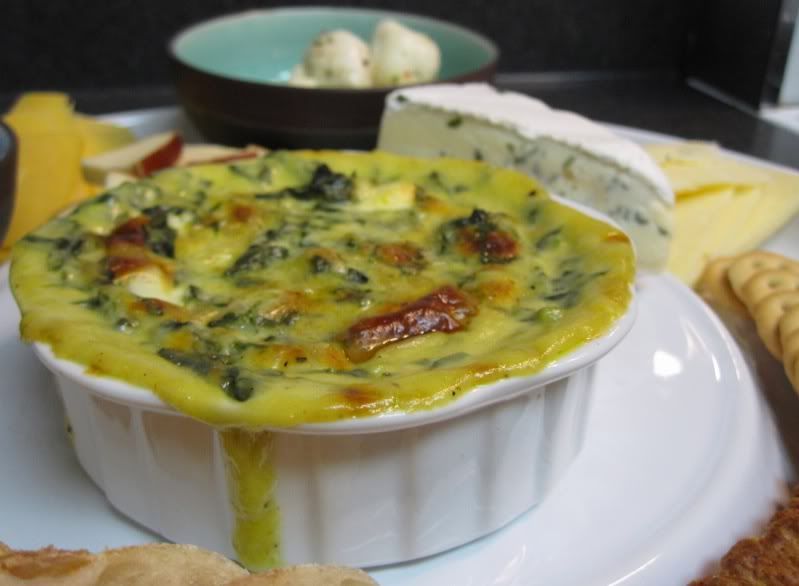
The Best Dip Ever

Do you like dip? And crackers or a baguette or what have you? Then you absolutely must make this Warm Spinach Mascarpone dip from Steamy Kitchen. If you haven't had mascarpone cheese, you are seriously missing out. It is similar in consistency to cream cheese, but the flavor is so light and airy, almost watery, and creamy. And its divine when you spread a little over figs and top with honey.


Warm Spinach Mascarpone Dip
adapted from Steamy Kitchen

1 package baby spinach

1 small onion, minced

2 Tbsp. olive oil

1/2 teaspoon sea salt

1/4 teaspoon freshly ground black pepper

1/4 teaspoon New Mexico hot chili powder

8 ounces mascarpone cheese, softened at room temperature

1/2 cup grated Parmesan cheese

Preheat the oven to 350F.

Heat a saute pan over medium heat. When hot, add the olive oil and swirl to coat. Add the onions and saute until soft and translucent, about 4-5 minutes Add the spinach and saute until wilted. Season and toss with salt, pepper, and chili powder. Turn off the heat and stir in the mascarpone cheese and the grated Parmesan.

Pour into 2 small ramekins (or other oven-safe dish) and bake for 20 minutes until the cheese is bubbling around the edges and slightly browned on top. Serve warm.

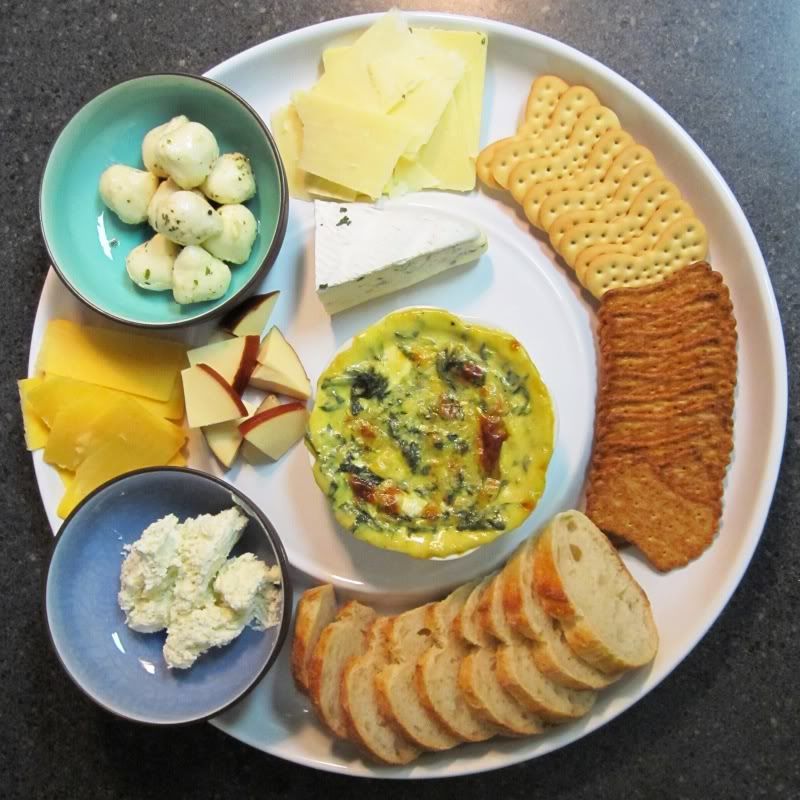
And here's how I served it, with sharp cheddar, extra sharp white cheddar, marinated mozzarella balls, roasted garlic stuffed brie, smoked Gouda, and Rondelle cheese spread, along with crackers and sliced sour french bread.

Saturday, January 2, 2010

Ring in the New Year


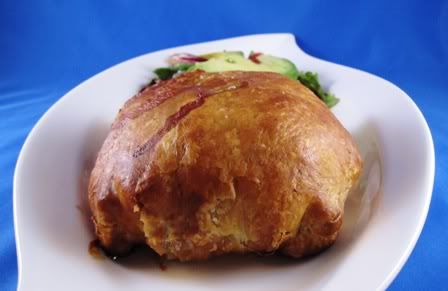
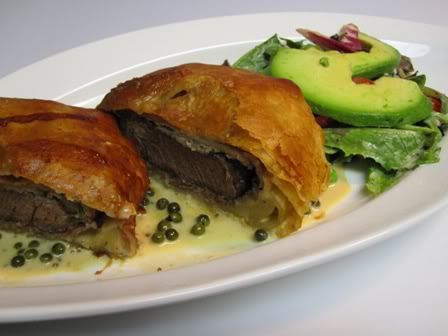
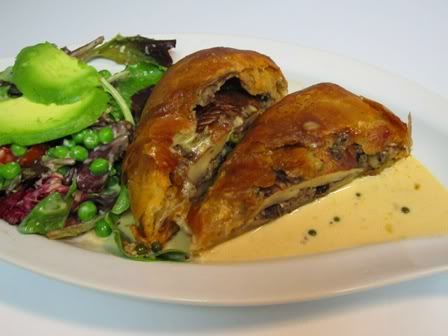
We welcomed the new year with bang this year. For our 1/1/10 dinner, I made Beef Wellington, a classic English dish where a beef tenderloin or Filet Mignon is coated with duxelles (minced mushrooms, shallots, and herbs sauteed in butter) and wrapped in puff pastry. Its easier than it looks, and has a great visual impact. The recipe I used comes from Tyler Florence and pairs the wellingtons with a creamy green peppercorn sauce. I served it with a simple green salad on the side, and made a vegetarian version for myself by using a portabello mushroom and omitting the prosciutto, and using vegetable stock in place of the beef in the sauce. Easy peasy!

Please pardon the over-cooked filet. Chris said it was still good!


Ultimate Beef Wellington (scaled down for two servings)

For the Duxelles:

  • 1 pints white button mushrooms
  • 1 shallots, peeled and roughly chopped
  • 2 cloves garlic, peeled and roughly chopped
  • 2 sprigs fresh thyme, leaves only
  • 1 tablespoon unsalted butter
  • 1 tablespoon extra-virgin olive oil
  • Salt and freshly ground black pepper

For the Beef:

  • 1 filet mignon
  • Extra-virgin olive oil
  • Salt and freshly ground black pepper
  • 2 thin slices prosciutto
  • 2 sprigs of fresh thyme, leaves only
  • 1 tablespoon Dijon mustard
  • Flour, for rolling out puff pastry
  • 1 sheet puff pastry, thawed if using frozen
  • 1 large eggs, lightly beaten
  • 1/4 teaspoon coarse sea salt
  • Minced chives, for garnish

Green Peppercorn Sauce:

  • 1 tablespoon olive oil
  • 1 shallots, sliced
  • 2 cloves garlic, peeled and smashed
  • 2 sprigs fresh thyme, leaves only
  • 1/2 cup brandy
  • 1 cup beef stock
  • 1 cups heavy cream
  • 1 tablespoon grainy mustard
  • 1/4 cup green peppercorns in brine, drained
To make the Duxelles: Add mushrooms, shallots, garlic, and thyme to a food processor and pulse until finely chopped. Add butter and olive oil to a large saute pan and set over medium heat. Add the shallot and mushroom mixture and saute for 8 to 10 minutes until most of the liquid has evaporated. Season with salt and pepper and set aside to cool.

To prepare the beef: Tie the tenderloin in 4 places so it holds its cylindrical shape while cooking. Drizzle with olive oil, then season with salt and pepper and sear all over, including the ends, in a hot, heavy-based skillet lightly coated with olive oil - about 2 to 3 minutes. Meanwhile set out your prosciutto on a sheet of plastic wrap (plastic needs to be about a foot and a half in length so you can wrap and tie the roast up in it) on top of your cutting board. Shingle the prosciutto so it forms a rectangle that is big enough to encompass the entire filet. Using a rubber spatula cover evenly with a thin layer of duxelles. Season the surface of the duxelles with salt and pepper and sprinkle with fresh thyme leaves. When the beef is seared, remove from heat, cut off twine and smear lightly all over with Dijon mustard. Allow to cool slightly, then roll up in the duxelles covered prosciutto using the plastic wrap to tie it up nice and tight. Tuck in the ends of the prosciutto as you roll to completely encompass the beef. Roll it up tightly in plastic wrap and twist the ends to seal it completely and hold it in a nice log shape. Set in the refrigerator for 30 minutes to ensure it maintains its shape.

Preheat oven to 425 degrees F.

On a lightly floured surface, roll the puff pastry out to about a 1/4-inch thickness. Depending on the size of your sheets you may have to overlap 2 sheets and press them together. Remove beef from refrigerator and cut off plastic. Set the beef in the center of the pastry and fold over the longer sides, brushing with egg wash to seal. Trim ends if necessary then brush with egg wash and fold over to completely seal the beef - saving ends to use as a decoration on top if desired. Top with coarse sea salt. Place the beef seam side down on a baking sheet.

Brush the top of the pastry with egg wash then make a couple of slits in the top of the pastry using the tip of a paring knife - this creates vents that will allow the steam to escape when cooking. Bake for 40 to 45 minutes until pastry is golden brown and beef registers 125 degrees F on an instant-read thermometer. Remove from oven and rest before cutting into thick slices. Garnish with minced chives, and serve with Green Peppercorn Sauce.

To make the sauce: Add olive oil to pan after removing beef. Add shallots, garlic, and thyme; saute for 1 to 2 minutes, then, off heat, add brandy and flambe using a long kitchen match. After flame dies down, return to the heat, add stock and reduce by about half. Strain out solids, then add 2 cups cream and mustard. Reduce by half again, then shut off heat and add green peppercorns.


* * * * *

By the way, Anna at twelve22 is hosting a giveaway for Zevia all natural zero-calorie sodas. The ginger ale looks great to me! Go here to find out how to enter.

Happy New Year!

Friday, January 1, 2010

365 Photo Friday

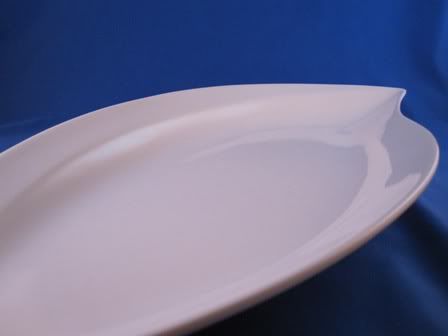
I've seen quite a few bloggers talk about Project 365 as a goal for 2010 - take a picture once a day, every day, for the entire year. Its an opportunity to create a comprehensive scrapbook of your life for a year. It can assist you in paying attention to everyday, since time seems to fly by faster every year. And it can help you become a better photographer. I was interested, but daunted. Until I saw Lindsey's 365 Photo Friday post. So, I am going to participate in Project 365 with Lindsey, posting my week's worth of pictures every Friday. And here's the inaugural picture:


I bought myself a tabletop photo studio set to help in one of my goals of becoming a better photographer. I don't get enough natural light in my kitchen for photos, and I'm usually cooking after dark anyway, so I needed a better lighting option. So far, so good. This is a picture using the light tent of a new leaf-shaped plate I also bought for styling, from a set of two.

Monday, December 21, 2009

Getting in the Spirit


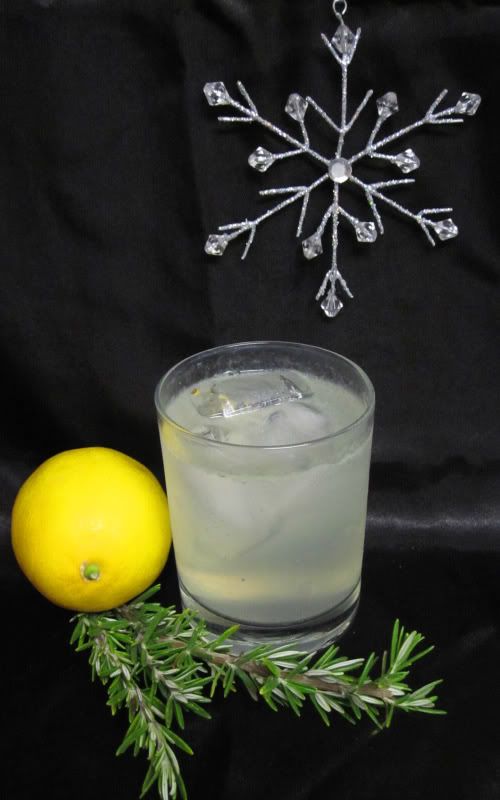
Its been a difficult season for me to get into the holiday spirit, which is frustrating me since Christmas is one of my favorite holidays. However, some family issues have prevented a festive feeling, and it looks like I might be spending this holiday alone. In an effort to raise my spirits at this prospect, I'm hitting the bottle!

I saw this recipe for Rosemary Gin Fizz and it sounded like it might do the trick. Christmas in a glass? Yes please! It is very easy, and tasty, and I think I'll have another one tonight! Go on over to Sassy Radish and get the recipe.

* * * * *


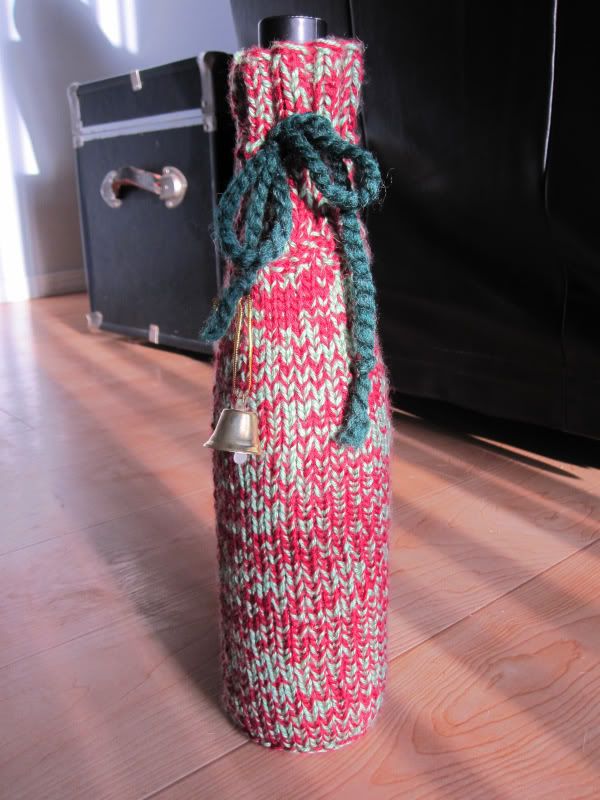
I also knit up this wine bottle cozy last night. Its a great alternative to using a bag or something as a wrapper for a gift. Its also a great stash buster to use up left-over partial skeins you might have. The pattern is from Tara's Knits, her Swirled Wine Bottle Cozy. I used some red and green yarn held double, and instead of doing the swirl pattern I went for plain stockinette since my variegating yarn looked too busy with the pattern as well. I also knit if flat and then seamed it up because I don't have the right size double-pointed needles.


* * * * *

And my little fiber optic Christmas tree.