Showing posts with label main course. Show all posts

Friday, May 6, 2011

Another Macaroni and Cheese


But can you ever really have too many mac & cheese recipes? I think not.

I was checking out Recipe Girl's site a while back and came upon her recipe for stuffed manicotti, and a light suddenly went on in my head. I've tried manicotti and stuff shells a few times in the past and always struggled with the boiled pasta splitting when I tried to fill it. She leaves the pasta uncooked, which makes it supremely easy to fill, and then covers it with a good amount of sauce so that everything cooks through. Brilliant! I followed her lead and made stuffed shells, and it worked like a charm.

And then I started thinking about other pasta dishes, and thought, why precook the pasta for macaroni and cheese? And why not throw in a generous amount of wine while I'm at it? The method is simple: make up your cheese sauce, toss with dry pasta, and bake. They key is to have a very saucy sauce that covers all of the pasta. And the end result is a perfectly al dente macaroni and cheese, with a nice strong wine flavor if you do it my way.


I also tossed in some chopped broccoli to add a veggie to the dish, and pretend its healthy despite the generous amounts of cheese I used. And I love BBQ alongside my macaroni and cheese, so I baked up some tofu slathered with BBQ sauce alongside it.


I'm still smitten with my large red ramekins, so I made individual servings of mac & cheese. Large individual servings, that is.


Here's the recipe!


Easy Baked Macaroni and Cheese
for two hungry people

1 cup dry pasta
1 cup broccoli, chopped 
1 1/2 Tbsp. butter
1 1/2 Tbsp. flour
1 cup milk
3/4 cup white wine
Salt and pepper
1 cup shredded cheddar cheese, or your favorite/mix

Preheat the oven to 375F. 

To make the cheese sauce: Melt the butter in a small saucepan of medium low heat. Add the flour and whisk constantly until the mixture turns golden brown. Then add the milk and stir occasionally until the mixture thickens. Add the wine (use more milk and less wine if you don't want it too wine-y), seasonings (salt and pepper as desired, garlic, red pepper flakes, or whatever else tickles your pickle), and cheese. Stir until the cheese is melted into the sauce.

Add the dry pasta and broccoli and toss until coated. Divide between to large ramekins, or one large oven-safe dish. Top with more shredded cheese if desired. Cover with foil and bake for about 45 minutes or until the pasta is cooked through, removing the foil for the last 10 minutes or so to crisp up the top.

Enjoy!

Related recipes:

Monday, April 4, 2011

What We Eat


I often wonder what everyone out there generally eat for their everyday dinners. This is one of our favorite meals, and it takes about half an hour to forty-five minutes to make, a lot of it unattended: sauteed veggies, mashed potatoes, and a protein which is usually baked tofu or a Quorn Naked Chik'n Cutlet as you see here. I've written about Quorn products before, and I've loved every one that I've tried. If you're looking for a vegetarian protein source I highly recommend these.

This meal is very flavorful and very satisfying. Here's a quick method:

1. Set the oven to 425F.

2. Get a pot of water boiling. Peel two baking potatoes and one sweet potato, cut into very large chunks, and add to boiling water.

3. Put the Chik'n Cutlets on a sheet of foil. Pour some balsamic dressing or other sauce or herb combination of your choice over the cutlets, then flip and pour more on the other side. Fold up the foil into a package. Put in the preheated oven to cook for 20 minutes.

4. Slice up some veggies of your choice - here I used leek, yellow squash, and red cabbage. Melt some butter in pan and saute the veggies. I put the leek in first so it would get soft, then added the squash, and at the end added the cabbage and some minced garlic so it would stay relatively crisp. Season with salt, pepper, and a dash of lemon juice. Set aside.

5. Drain the potatoes when they're soft. Put a tablespoon or so of butter in the pot you cooked the potatoes in and let it melt, then toss in some minced garlic. Add in the drained potatoes and a few tablespoons of milk and mash, adding more milk if necessary.

6. Layer it all on a plate and enjoy!


So what do you have for dinner?


Related Recipes: 

Wednesday, March 9, 2011

Just Call Me Abuelita


Who doesn't love a fresh homemade tamale? People are usually daunted by the prospect of making tamales on their own, but when I saw the recipe for Vegetarian Tamales on Tasty Kitchen recently I knew I had to try. And really, it wasn't hard or overly time consuming.

I made up a tasty filling, soaked the corn husks for wrapping, and mixed up the masa dough, and then set to spreading, filling, wrapping; rinse and repeat. And I ended up throwing most of them, uncooked, in the freezer for future meals. The longest part of the process is the steaming, which takes an hour and a half (and longer if frozen), so plan ahead a bit: I'm usually home around 4:30, so I'd toss some in my steamer when I get home from work, and about two hours later toss together a salad, and have a tasty dinner by 7:00.


Roasted Vegetable Tamales
adapted from Tasty Kitchen

1 package corn husks
2 cups masa
1 tsp. baking powder
3/4 tsp. salt
2 tsp. chili powder
2 1/4 cups veggie broth
1 stick butter, softened
 
1 sweet potato, chopped
1 zucchini, chopped
2 cloves garlic, minced
1 Tbsp. olive oil
3 green onions, chopped
1 bunch cilantro, chopped
2 Roma tomatoes, chopped
1/2 lime, juiced
1/2 cup shredded cheddar

Toss the sweet potato, zucchini, and garlic with the olive oil and season with salt and pepper. Roast the mixture in a 375F oven for about 45 minutes, or until done. Feel free to use whatever assortment of veggies tickles your pickle too, such as winter squash, regular potato, asparagus, etc.

Soak the corn husks in water for at least 30 minutes. I used a giant saute pan, filled with water, and weighted the corn husks down with another pot.

In a bowl combine the masa, baking powder, 1/2 tsp. salt, and 1 tsp. chili powder. Add 2 cups of the veggie broth to form a dough. In a separate bowl cream the butter until fluffy, then add the masa dough and mix well.

Combine the roasted vegetables with the green onions, cilantro, tomatoes, lime juice, the remaining 1 tsp. chili powder and 1/4 cup veggie broth, and cheese. Taste and season as needed.

Take one of the soaked corn husks and spread at least a couple tablespoons of the masa dough in the center. Put a spoonful of the veggie filling down the middle, but not to the very end of the masa dough. Then wrap it all up like a burrito and tie of the ends with strips of another corn husk. Keep going until you've used up your masa dough and filling. You may need to use two husks when they are smaller, to wrap everything securely. I've read that you can also use foil in place of the corn husks, but I haven't tried it.

Either put them in a freezer bag at this point and pop them in the freezer, or get ready to cook your tamales. I used a big stock pot with a steamer basket in the bottom, or you can suspend a metal colander over boiling water, or use a real steamer if you have one. Get your water boiling and add your tamales, making sure they aren't touching the water. Steam for 90 minutes, checking the water to make sure you don't run dry and burn your pot, then check one: if the masa's firm, you're ready for dinner!


Kind of a crummy picture, but they tasted great. I served mine with an slaw of red cabbage, carrot, and cilantro (dressed with mayo, lime juice, a splash of apple cider vinegar, chili powder, salt and pepper), and vegetarian refried beans. I haven't tried the from-frozen tamales yet, but I'm sure they'll taste just as good, just take a little longer to cook.

Related recipes:

Friday, February 4, 2011

Gourmet Pizza


We've been getting Zachary's Pizza quite a bit lately - its delicious, Chicago-style deep dish with copious amounts of cheese on the bottom and all the toppings on top. But maybe we've done that a few too many times lately, and even though I came home from work tonight exhausted and not wanting to do anything, when Chris said he wanted pizza for dinner and I thought about what I had in my fridge to use, I was ready to get cooking.

I used my standard pizza dough recipe, substituting a cup of buckwheat flour for one of the cups of AP flour, and topped it with Bechamel sauce, fresh mozzarella, roasted butternut squash, Merlot-caramelized red onions, some frozen chopped spinach, and a little Parmesan. And it was quite tasty!


We've got an escapee
 
For the Pizza Dough:
2 cups all-purpose flour, plus more as needed
1 cup buckwheat flour
2 tsp. instant yeast
2 tsp. coarse kosher or sea salt
2 Tbsp. garlic olive oil

Combine the flour, yeast, and salt in a food processor. Turn the machine on and add 1 cup water and 2 tablespoons of the oil through the feed tube.

Process for about 30 seconds, adding more water, a tablespoon or so at a time, until the mixture forms a ball and is slightly sticky to the touch (I haven't had to add any extra water). If its dry, add another tablespoon or two of water (but no more than a total of 1/4 cup in this step) and process for another 10 seconds. (In the unlikely event that the mixture is too sticky, add flour a tablespoon at a time.)

Turn the dough onto a floured work surface and knead by hand for a few seconds to form a smooth, round dough ball. Put the remaining olive oil in a bowl, turn the dough ball in it, and cover the bowl with plastic wrap; let rise until the dough doubles in size, 1 to 2 hours.
 
Knead the dough, and let it rest for five or ten minutes. Then roll it out, place it on a cookie sheet and bake in an very hot  (475°F or higher) oven until golden brown and cooked underneath.


For the Bechamel Sauce:
1 cup milk
1 Tbsp. butter
1 Tbsp. flour
Salt and pepper to taste

Heat the milk until very warm but not boiling. In another pan melt the butter on medium heat; do not let it brown. Whisk in the flour and cook for 3 to 4 minutes, stirring constantly, until golden. Gradually add the hot milk and continue whisking until the sauce thickens. Add salt, pepper, and nutmeg to taste.

For the Merlot-Caramelized Onions:
1 large red onion, sliced very thin
1 Tbsp. butter
1/4 cup Merlot
1 Tbsp. brown sugar
Salt and pepper to taste

Melt the butter in a pan over medium heat. Add the onions and saute until starting to turn color. Add the Merlot and brown sugar, cover and reduce heat, and cook until caramelized, about 30 minutes, stirring occasionally. Add salt and pepper when they are as caramelized as you want, and serve.

Related recipes:
Waffle Pizzas
Cheater's Risotto
Risotto with Roasted Butternut Squash and Garlic
Wheat Berry Salad with Roasted Vegetables

Wednesday, December 8, 2010

Biscuits and Gravy: Deconstructed


Call me bandwagon jumper, and I won't disagree. The fact is, I'm a little late to this party already.

"Deconstructing" took the food world by storm perhaps four or five years ago, and Tom Colicchio of Bravo's Top Chef explains the phenomenon succinctly as "... an approach to a plating style, as well as a way of personalizing a dish and making it one’s own." Its about taking the different elements of a dish and putting them together in a different fashion. Its basically another way of playing with your food.

Technically, my biscuits and gravy aren't really deconstructed. I separated the dish into three components: the biscuit, the gravy, and the sausage (since I always remember it being a sausage gravy). Then I plated it all on one of my favorite leaf-shaped plates and we ate - tearing off bits of biscuit and dipping them in the gravy, spearing slices of sausage and biscuit to dip together, eating the gravy on its on, and doing whatever else sounded good. I didn't really put the components back together in a new way, but eating the dish this way allowed us to pay more attention to the various components themselves, which might have gotten lost in a big ol' pile of biscuits smothered in gravy. Not that there's anything wrong with that either!

And of course I slightly altered the individual components. I just can't leave well enough alone, so I made cheddar garlic biscuits, a creamy mushroom gravy with a good splash of wine (a lovely Bowers Harbor Vineyards Gewurztraminer, from a wonderful friend in Michigan, because its what I was drinking that night!), and vegetarian Italian sausages (I like Lightlife's Smart Sausages and Morningstar Farms Italian Sausages best).


The sausages aren't the only shortcut I took. The biscuits are Bisquick! We always had this around when I was growing up, and keeping a box handy makes pancakes, waffles, biscuits, and more even easier when you just can't be bothered to do anything harder. I used the recipe on the back of a box of Heart Smart Bisquick and threw in about a cup of grated cheddar, three cloves of minced garlic, and a pinch of Herbes de Provence.

I did, however, make the gravy...


 Hearty, Creamy Mushroom Gravy


  • 2 Tbsp. unsalted butter
  • 6 ounces mushrooms, sliced
  • Salt
  • Black pepper
  • 1 1/2 Tbsp. all-purpose flour
  • 1 Tbsp. white wine
  • 1 c. vegetable broth
  • 1/2 tsp. thyme
  • 1/4 c. heavy cream
Melt the butter in a skillet over medium-high heat. Add the mushrooms and cook, stirring occasionally,for about 8 minutes. Season with salt and pepper. Add the flour and stir until lightly browned, about 1 minute. Add the wine and broth and bring to a boil, cooking until thickened, about 2 minutes. Add the cream and thyme, and season with salt and pepper.


Its easy-peasy, and very tasty! Now get on out there and play with your food!

Related Recipes:
Sunday, October 17, 2010

Three in One


"Meat"loaf base, topped with a layer of creamed spinach souffle, and finished with a generous helping of garlic Parmesan mashed potatoes. What do you call this? Meatloaf terrine? A take on Shepard's pie? Casserole? I don't know, but I call it tasty!

I don't have exact recipes, since this is really just layering three yummy dishes. Make your favorite meatloaf recipe (I used faux ground beef and the usual meatloaf suspects - bread crumbs, egg, seasonings).If you use a big pan you can make one big dish, but I liked the idea of smaller terrines so I used large ramekins.

For the spinach, I sauteed garlic and onions in butter, then added baby spinach and cooked until wilted and bright green. Next add heavy cream and a little cornstarch and cook until slightly thickened. Whiz together in a food processor with an egg or two until combined and the spinach is chopped. Return to the pan and cook, stirring frequently so the eggs don't scramble, until thick. Then put a layer of this spinach mixture on top of the meatloaf mixture.

Mashed potatoes are simple. I like to put garlic, butter, cream, and Parmesan in mine, and use my food processor to whip them. Some people don't like the consistency of using a food processor as it makes them a little gluey, so feel free to mash them with a standard potato masher. I like the gluey consistency and the ease of using the food processor. Mound the mashed potatoes over the spinach, and top with more Parmesan, then bake at 350F for 30 minutes or until the meatloaf at the bottom is cooked through.


This was a great dinner for the first rainy day of fall: hearty, homey, and warming. I think the next time I make this I want to get some small springform pans and see if I can remove it completely after cooking. The spinach would probably have to be less creamy, and I'd most likely have to use less mashed potatoes, but it would look great on a plate.

Saturday, July 24, 2010

Creamy Macaroni and Cheese


This is what I had for breakfast - banana blueberry pancakes. And now I have a bag full of pancakes in the fridge, since I'm the only one here who usually eats breakfast, ready to be reheated and re-crisped in the oven for a few more days. They are great too, even for cheater pancakes. Yup, I used Bisquick. And I used the recipe on the back of the box for melt-in-your-mouth pancakes (to the regular recipe add 1 tablespoon each of sugar and lemon juice, and 1 teaspoon each of baking powder and vanilla). I also added my last handful of fresh blueberries and a chopped banana.

But you're not here for the pancakes... because I ate them. No, you're here for the creamy macaroni and cheese.


I used to make macaroni and cheese where I baked it after combining the pasta and cheese sauce, but I've found that to make it too dry. Although cutting a cold hunk of macaroni and cheese out of the dish from the fridge the next day and being able to eat it out of hand is always fun. I had a macaroni epiphany last winter while visiting with family and making dinner. The back of the cornstarch box had a recipe for cheese sauce that yielded something silky smooth and cheesy. Then I realized if I wanted a creamier mac and cheese, I should just skip the baking step, which is what I've done since.

Creamy Macaroni and Cheese

1 package of cooked pasta (I used bowties this time)
2 Tbsp. butter
1 cup milk
1 Tbsp. cornstarch (or 2 Tbsp. flour)
Seasonings as desired
2 c. or more of shredded cheddar cheese

Get your pasta cooking in salted water. 

While the pasta is bubbling away, melt the butter in a saucepan over medium low heat. If you're using flour, add it to the melted butter and stir with a wooden spoon or whisk constantly until golden, then add the milk. If you're using cornstarch, mix it with about 1/4 cup of the milk and add the cornstarch mixture and the rest of the milk. Stir until thickened, then add whatever seasonings you wish. I used salt, pepper, garlic, dry mustard, and crushed red chili flakes this time. Then add the cheese and stir until melted.

When the pasta is cooked, drain and toss with the cheese sauce. I like BBQ sauce and Sriracha sauce with my mac and cheese, as well as topping it with a little shredded Parmesan and sliced basil.


Related Recipes:
Tuesday, April 13, 2010

Zu - Zu - Zu- cchini!

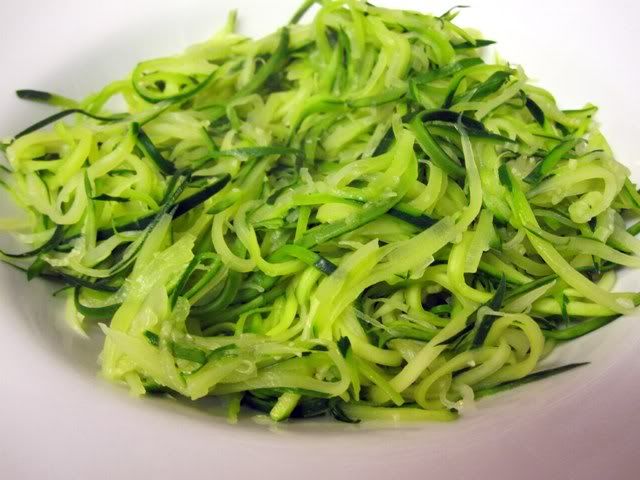
Is it just me, or is zucchini an awesome word? Say it out loud a few times and tell me differently. This summer squash cooks up fast and is quite versatile. I've been wanting pasta lately, but often feel like pasta can be a waste of calories. And Chris is back to limiting the amount of carbohydrates in his diet (he vacillates between eating them and not eating them, but notes that he just feels better overall when he avoids most carbs), which can be a bit of a challenge for a vegetarian cook. There's only so many meat and salad dishes I can make without losing interest, since I'm not eating the meat I make for Chris. And I prefer cooking something that we can enjoy together. Right in the nick of time, I saw zucchini noodles mentioned somewhere and couldn't wait to give them a try. Its really just a simple, quick method of preparing zucchini, and the "noodles" make for a healthy bed for a sauce of some sort.


So grab some zucchini and let's go! Two zucchini make a Chris-sized portion, so if you're cooking for a couple of people get three or four. Lop off the ends and use a mandoline slicer, zester, julienne peeler, or a knife to make julienne strips the length of the squash. There's no need to peel the zucchini first, and the variation in color makes the finished dish look nice anyway.

Put the zucchini noodles in a colander over a bowl, sprinkle with salt, toss, and let sit for 15 to 30 minutes. This softens the noodles a bit. Then toss the noodles in boiling water for a minute (that's right, one minute), drain, and serve.

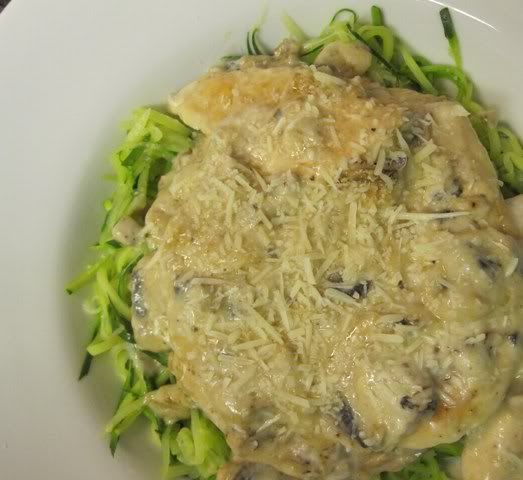
I served these noodles topped with a mushroom chicken bake - pretty much the same as you'll find on the back of a can of Campbell's condensed mushroom soup. Mmm... comfort food. I made it in two pans, one with chicken for Chris and the other with a Quorn Naked Chik'n Fillet for me. If you go the vegetarian route, do not cook it in the oven for a full 30 minutes. The Quorn fillet will be fine, but the sauce will dry up and then you'll look longing over at your husbands bowl with creamy mushroom sauce over a bed of vibrant green zucchini noodles, wondering if it tastes as good as you had hoped it would while said husband declares it is fantastic and praises the invention of the zucchini. Not that that happened, or anything.

Here's the recipe for the chicken version.


Mushroom Chicken Bake
from Campbell's

4 skinless, boneless chicken breast halves  (about 1 pound)
Lemon pepper seasoning
1 tablespoon vegetable oil
1 can (10 3/4 ounces) Campbell's® Condensed Cream of Mushroom Soup
1 can (4 ounces) sliced mushrooms, drained (I used fresh sliced mushrooms)
2/3 cup milk
1/2 cup grated Parmesan cheese
1 clove garlic, crushed (I used 4 cloves, and my garlic press)
Ground black pepper

1. Season the chicken with the lemon pepper seasoning.  Heat the oil in a 10-inch skillet.  Add the chicken and cook for 10 minutes or until well browned on both sides.  Place the chicken into a 2-quart baking dish.

2. Stir the soup, mushrooms, milk, cheese and garlic in a small bowl.  Season with the black pepper.  Pour the soup mixture over the chicken.

3. Bake at 350°F. for 30 minutes or until the chicken is cooked through.  Serve the chicken and sauce with pasta, rice, or zucchini noodles!


Psst: Want a chance to win a gorgeous baking pan or pitcher? Then head on over to Cherry on a Cake and enter! I'm partial to the baking pan, myself...

Related Recipes:


Wednesday, March 31, 2010

Lentil Burgers


Last night was a good night for burgers. Of course, my husband would ask when isn't it a good night for burgers? I like Gardenburgers quite a bit, but haven't seen the original version available for a while. They carried giant boxes of them at my local Costco six months or so ago, but none since. So I've been making my own veggie burgers at home. Most often I use beans such as chickpeas, but last night I used lentils. And it was good!


I find many restaurant veggie patties to be mushy, so be sure to make these on the thinner side so that everything cooks and you get a higher ratio of crispy outside to softer inside.

Lentil Burgers

Makes 6 patties
By Mark Bittman

2 cups cooked lentils
1/2 cup rolled oats
1 small onion, roughly chopped
1 egg
1 Tablespoon chili powder
Salt and pepper

Put all ingredients in a food processor (feel free to add other seasonings such as garlic or fresh herbs, and even toss in some shredded cheese if you like). Pulse until its all mixed together, but not pureed. You want to keep some lumps in there for texture. Let rest 10 minutes or so, then shape patties with wet hands to keep the lentil mixture from sticking to you too much. At this point you can cook them however you like. If you want to use a pan I would suggest freezing them for a bit to help the patties retain their shape and not fall apart while cooking, and cook/fry until nicely browned. This time, however, I cooked mine on the BBQ.


I sprayed a sheet of foil with cooking spray, and then put the whole thing over a relatively high flame. After about ten minutes I flipped them over and cooked for another eight minutes. I used foil because these burgers would not fare well on the grate. I did get some lovely char lines, even through the foil, and a nice smoky taste (maybe because I need to clean my BBQ and the accumulation of burned food bits on the bottom smoke when I use it).

Then serve as you would any other burger and with the toppings of your choice. We opted to forgo the usual bun/lettuce/tomato/etc. this time and had the lentil burgers simply on a plate with a thick slice or two of sharp white cheddar, and a side of broccoli that was out of this world (I'll share in a day or two, promise!).

Thursday, February 4, 2010

Tempeh ProvenÒ«al

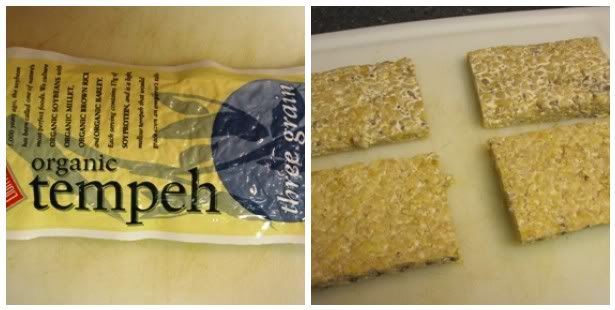
Tempeh is a fermented soybean cake that has its origins in Indonesia. And its much tastier than that sounds.


See? It boasts a higher protein, dietary fiber, and vitamin content than its cousin tofu, as well as a firmer texture and stronger flavor.

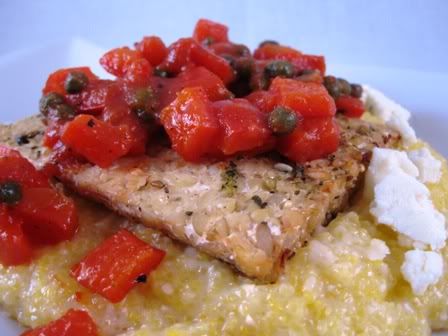
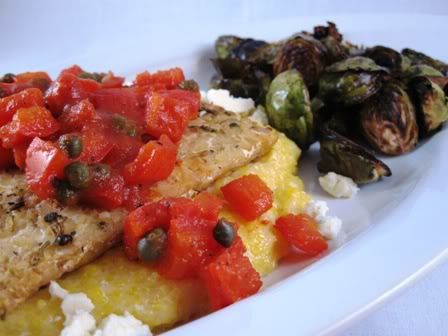
I made this recipe for Tempeh ProvenÒ«al from Vegetarian Times, and its pretty good. A few changes I would make for the next time:

- Double the sauce recipe (at least!). Its tasty, but there was just about enough there for the two of us.- I don't know what tempeh they used, but mine did not turn out all pretty and golden like their picture. I think pan-frying rather than baking the tempeh would be good, to give it a crisper texture. And cut the tempeh into six thinner pieces instead of four.

- VT suggests serving it atop rice, but I used polenta instead and think it was a good choice. The soft polenta is a nice contrast to the crisped tempeh and slightly chunky sauce.

- I also sprinkled some blue cheese crumbles over the polenta to add an earthy flavor to the dish, which went well with the tangy sauce.

The recipe itself was straightforward, though I was doing a few different things all at one at the end:

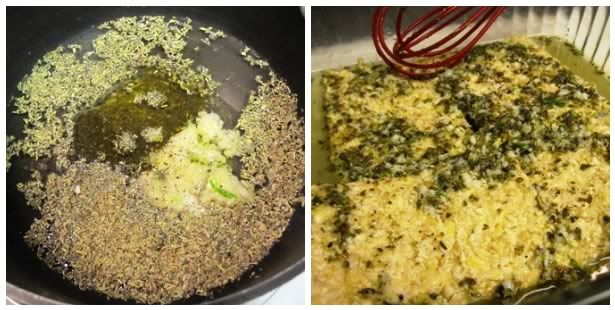
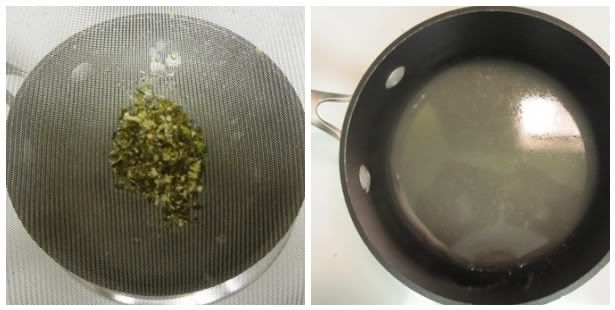
Cut your tempeh and put in a baking dish. Bring 1/2 cup white wine, 1Tbsp. herbes de Provence, 1 Tbsp. oil, a couple cloves of crushed garlic, and a dash of pepper to a boil in a small saucepan. Pour it over the tempeh and stick it in the fridge for 4 hours or overnight to marinate.

When its ready, put the tempeh on a baking sheet (reserve the marinade) and bake in a 400°F oven for 15 minutes, then flip and bake for another 15 minutes.

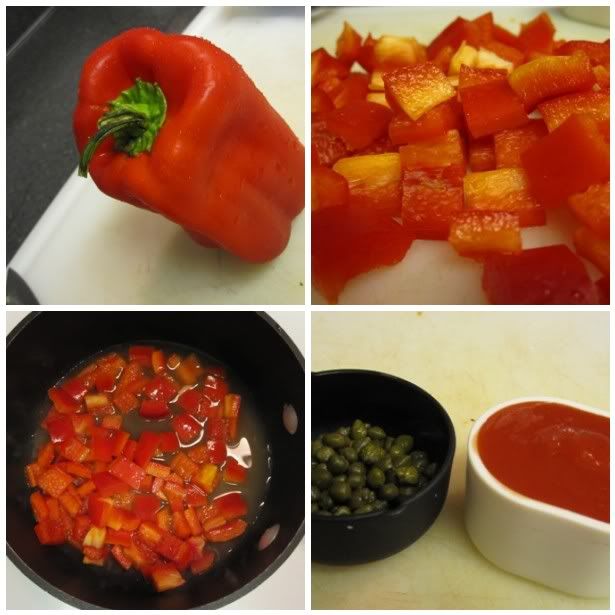
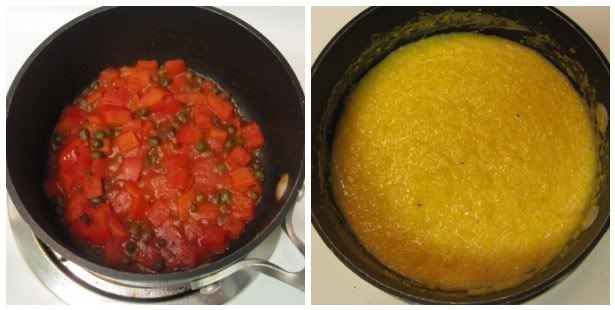
While the tempeh is baking, strain the marinade into a small saucepan. Bring to a boil and add a chopped red bell pepper. Simmer 5 to 7 minutes, until the pepper is soft and the liquid is nearly absorbed. Then add 1/4 cup tomato sauce, 2 Tbsp. drained rinsed capers, and a pinch of sugar. Season with salt and pepper, and cook for about 10 minutes over low, until the sauce is thick.

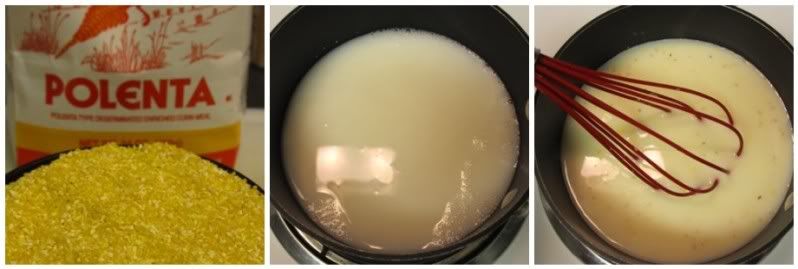
While the sauce is cooking, I whipped up some quick polenta: Bring 2 cups water + 1 cup milk nearly to a boil. Slowly add 1 cup polenta in a steady stream while whisking, so you don't get clumps. Cook for 10 minutes or so, stirring often, until thick and creamy. Polenta will set up quick, which isn't a bad thing. By the time I got our meal on the table, after plating and taking pictures, it was no longer porridge-like, but still yummy.

The pepper sauce and polenta should finish up at just about the same time. Add 1/2 cup chopped basil to the sauce (I didn't have any on hand), and plate.

I served mine with some roasted Brussels sprouts. This is a hearty meal!

Thursday, January 7, 2010

Acorn Squash Tacos


In the mood for a healthy and quick dinner the other night, I looked over my favorite orange metal colander with carrot-shaped cutouts that sits on my counter and holds produce that doesn't go in the fridge, selected a few items (with some more help from the fridge produce), and whipped up some quick vegetarian tacos. Run Lori Run! asked for more veggie meals, and I'm only too happy to oblige (and go check out her adorable creations!).


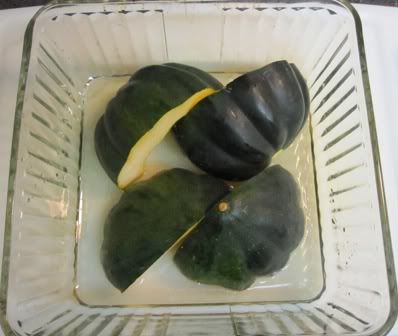
First up, the acorn squash. Oh how I love funny looking foods! Acorn squash is a hard winter squash, a good source of dietary fiber and potassium, as well as vitamin C. And it looks like a big green (or gold, depending on the variety) acorn.

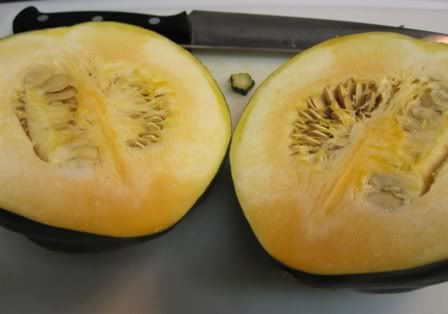
Chop it in half...


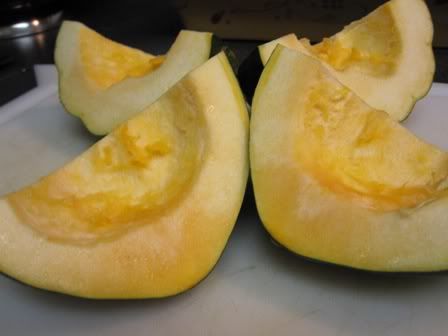
Scoop out the seeds, and chop the halves in half, horizontally. Or vertically, it probably doesn't matter. (Looking at the quarters from above, I kept seeing synchronized swimmers. Don't know why, but now acorn squash will always make me think of water ballet.)


Squash is often baked, but I was going for quick this time around. Put the quarters in a microwaveable dish and add 1/4 cup of water. Cover with plastic wrap and nuke for 8 to 10 minutes, until soft.


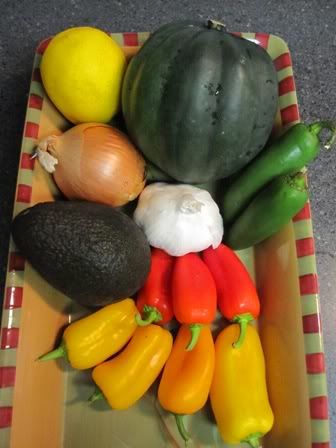
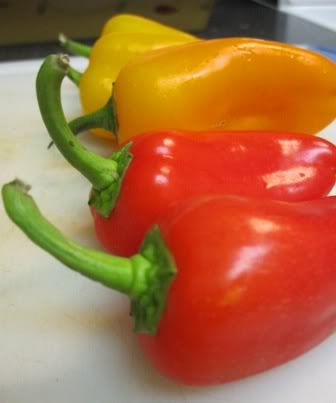
While the squash is cooking, take a pepper (or a handful of mini peppers, as I had on hand) ...


... and slice into strips.


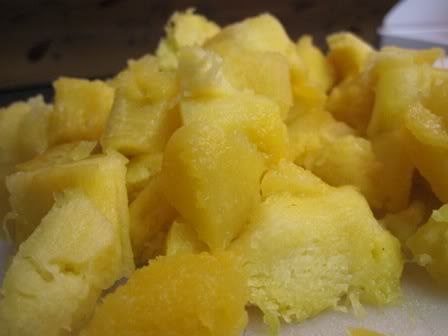
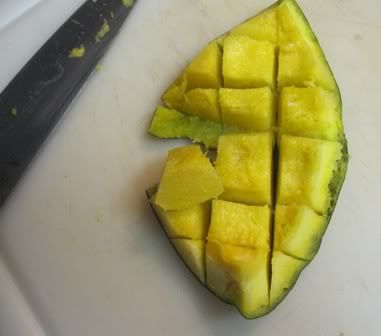
Now the interesting part. When the squash is done, its gonna be hot! The flesh is quite soft (and tasty!), but you have to get it off of the rind. I scored each quarter like a mango and used my knife to inelegantly slice the squash away. I'm sure there's a better method, and if you know it, let me know in the comments!


However you slice it, you end up with a pile of squash-y (squash-ed?) goodness.


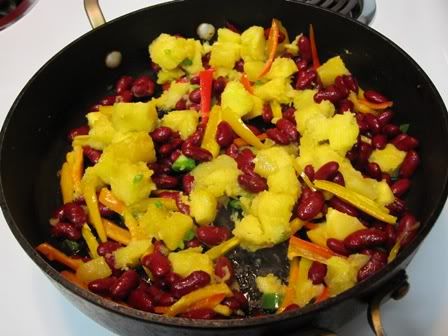
Heat a glug or so of olive oil in a skillet. When hot, add some minced garlic and onion, if that tickles your pickle (I added half a jalapeno pepper, minced), the sliced peppers, the kinda-cubed squash, and a can of kidney beans for extra protein (previously rinsed and drained, of course). Any spices you like, such as cumin or chili powder or Taco seasoning, are good here too.


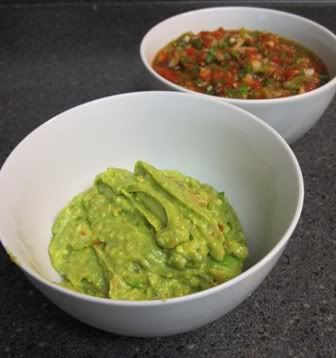
Cook this up, stirring occasionally, for about 10 minutes or until everything is good and hot. While its cooking you can whip up some fresh salsa and guacamole if you like: In a food processor, add a can of Mexican-style stewed tomatoes with juice, however many minced jalapenos your taste buds can handle, a chopped onion, a couple of cloves of minced garlic, half a bunch of cilantro, the juice of half a lemon or lime, and some salt and pepper. Process until everything is chopped up, but still chunky... basically until it looks like salsa and transfer to a bowl. Reserve a little salsa in the processor, add in a chopped avocado or two, and process again for guacamole. Simple!


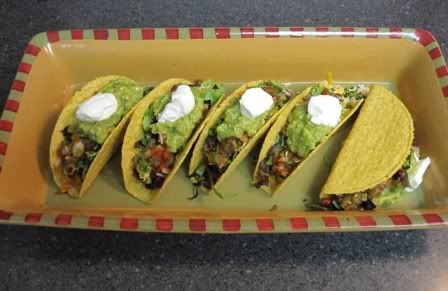
Then assemble your tacos. I had some Old El Paso Stand 'n Stuff taco shells on hand from buying them at the market on a whim, and they are convenient. I would suggest using a harder shell (bought or homemade) for these tacos since the squash is soft, so you have some contrast in the textures. But cooking is all about experimentation, so knock your own socks off!

I put some of the taco mixture in the bottom, topped with a mix of shredded sharp and extra-sharp white cheddar cheeses, then shredded lettuces, then salsa and guacamole. And on the very top... that isn't sour cream, but plain yogurt. I always have a ton of plain yogurt around (and if you own a bulldog, you may know why) and usually use it in place of sour cream for most things. Its better for you and you still get that tangy taste.

I love the little fallen-over guy on the right there!

So, I don't have a written recipe for this, because its tacos. Add in whatever you want, and if you have tons of leftovers the filling is great for a taco salad the next day (or burritos, or more tacos...). But I hope this gives you non-veggie-eaters out there a little incentive to try a non-traditional taco filler. My resident carnivore loved them!

Saturday, January 2, 2010

Ring in the New Year


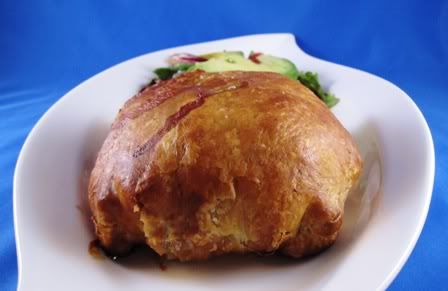
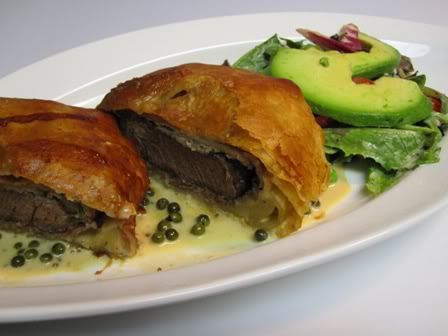
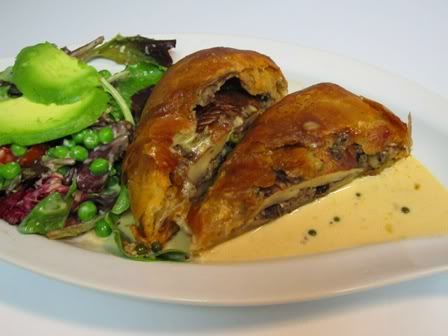
We welcomed the new year with bang this year. For our 1/1/10 dinner, I made Beef Wellington, a classic English dish where a beef tenderloin or Filet Mignon is coated with duxelles (minced mushrooms, shallots, and herbs sauteed in butter) and wrapped in puff pastry. Its easier than it looks, and has a great visual impact. The recipe I used comes from Tyler Florence and pairs the wellingtons with a creamy green peppercorn sauce. I served it with a simple green salad on the side, and made a vegetarian version for myself by using a portabello mushroom and omitting the prosciutto, and using vegetable stock in place of the beef in the sauce. Easy peasy!

Please pardon the over-cooked filet. Chris said it was still good!


Ultimate Beef Wellington (scaled down for two servings)

For the Duxelles:
  • 1 pints white button mushrooms
  • 1 shallots, peeled and roughly chopped
  • 2 cloves garlic, peeled and roughly chopped
  • 2 sprigs fresh thyme, leaves only
  • 1 tablespoon unsalted butter
  • 1 tablespoon extra-virgin olive oil
  • Salt and freshly ground black pepper

For the Beef:

  • 1 filet mignon
  • Extra-virgin olive oil
  • Salt and freshly ground black pepper
  • 2 thin slices prosciutto
  • 2 sprigs of fresh thyme, leaves only
  • 1 tablespoon Dijon mustard
  • Flour, for rolling out puff pastry
  • 1 sheet puff pastry, thawed if using frozen
  • 1 large eggs, lightly beaten
  • 1/4 teaspoon coarse sea salt
  • Minced chives, for garnish

Green Peppercorn Sauce:

  • 1 tablespoon olive oil
  • 1 shallots, sliced
  • 2 cloves garlic, peeled and smashed
  • 2 sprigs fresh thyme, leaves only
  • 1/2 cup brandy
  • 1 cup beef stock
  • 1 cups heavy cream
  • 1 tablespoon grainy mustard
  • 1/4 cup green peppercorns in brine, drained
To make the Duxelles: Add mushrooms, shallots, garlic, and thyme to a food processor and pulse until finely chopped. Add butter and olive oil to a large saute pan and set over medium heat. Add the shallot and mushroom mixture and saute for 8 to 10 minutes until most of the liquid has evaporated. Season with salt and pepper and set aside to cool.
To prepare the beef: Tie the tenderloin in 4 places so it holds its cylindrical shape while cooking. Drizzle with olive oil, then season with salt and pepper and sear all over, including the ends, in a hot, heavy-based skillet lightly coated with olive oil - about 2 to 3 minutes. Meanwhile set out your prosciutto on a sheet of plastic wrap (plastic needs to be about a foot and a half in length so you can wrap and tie the roast up in it) on top of your cutting board. Shingle the prosciutto so it forms a rectangle that is big enough to encompass the entire filet. Using a rubber spatula cover evenly with a thin layer of duxelles. Season the surface of the duxelles with salt and pepper and sprinkle with fresh thyme leaves. When the beef is seared, remove from heat, cut off twine and smear lightly all over with Dijon mustard. Allow to cool slightly, then roll up in the duxelles covered prosciutto using the plastic wrap to tie it up nice and tight. Tuck in the ends of the prosciutto as you roll to completely encompass the beef. Roll it up tightly in plastic wrap and twist the ends to seal it completely and hold it in a nice log shape. Set in the refrigerator for 30 minutes to ensure it maintains its shape.
Preheat oven to 425 degrees F.

On a lightly floured surface, roll the puff pastry out to about a 1/4-inch thickness. Depending on the size of your sheets you may have to overlap 2 sheets and press them together. Remove beef from refrigerator and cut off plastic. Set the beef in the center of the pastry and fold over the longer sides, brushing with egg wash to seal. Trim ends if necessary then brush with egg wash and fold over to completely seal the beef - saving ends to use as a decoration on top if desired. Top with coarse sea salt. Place the beef seam side down on a baking sheet.

Brush the top of the pastry with egg wash then make a couple of slits in the top of the pastry using the tip of a paring knife - this creates vents that will allow the steam to escape when cooking. Bake for 40 to 45 minutes until pastry is golden brown and beef registers 125 degrees F on an instant-read thermometer. Remove from oven and rest before cutting into thick slices. Garnish with minced chives, and serve with Green Peppercorn Sauce.

To make the sauce: Add olive oil to pan after removing beef. Add shallots, garlic, and thyme; saute for 1 to 2 minutes, then, off heat, add brandy and flambe using a long kitchen match. After flame dies down, return to the heat, add stock and reduce by about half. Strain out solids, then add 2 cups cream and mustard. Reduce by half again, then shut off heat and add green peppercorns.


* * * * *

By the way, Anna at twelve22 is hosting a giveaway for Zevia all natural zero-calorie sodas. The ginger ale looks great to me! Go here to find out how to enter.

Happy New Year!

Tuesday, October 20, 2009

Bring on the Fall Foods!

Fall seems to be officially here - last week we had the largest rain storm out here apparently since the '60s, with winds gusting to 60mph. I think I hydroplaned most of my way home from work that evening. Then it got hot and muggy, and then it rained some more. Gotta love that weather!

Now that it is autumn I find myself spending more time in the kitchen (its warm!), cooking warm appetizers, winter squashes, baked goods, and hearty tasting foods. I went to a party Friday night with lots of wine, chocolate martinis, and tasty food, and might have woken up still drunk the next morning. A delicious dinner Saturday night sounded like a wonderful way to rest.

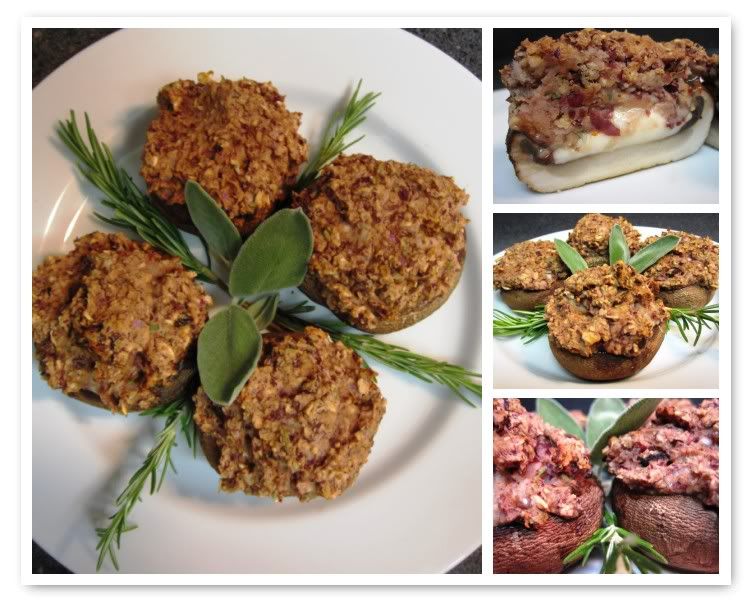
First up... Stuffed Mushrooms


I saw this recipe for mushrooms stuffed with mini-meatloaves, and with my love of miniature foods, I made it my own. The stuffing is based on the bean burgers from Bittman's "How to Cook Everything Vegetarian."

Ingredients

1 can (14 oz.) chickpeas, drained and rinsed
1 medium onion, roughly chopped
1/2 cup oat (not quick-cooking)
Fresh rosemary and sage
Salt and pepper
1 egg

Combined all ingredients in a food processor and pulse until chunky but not pureed. Let mixture rest in the fridge for a while (I left mine for about thirty minutes).

Assembly

Preheat over to 375°F and line a baking sheet with foil. Clean and remove the stems from however many mushrooms you want to make. I used baby portabellos, but I've seen mushrooms labelled "stuffing mushrooms" in the store. Put a cube of cheese (I used marinated mozzarella balls) in the mushroom cup. Wet hands, since the bean mixture is very sticky, and top the mushroom with a patty. Bake for 20 minutes.

* * * * *

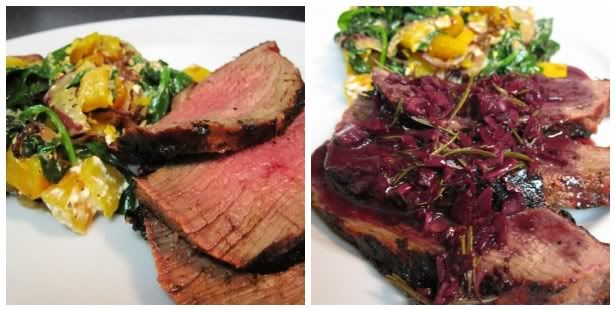
Main course... Tri-Tip with Rosemary Red Wine Reduction (from the Raley's "Something Extra" magazine, but I can't find it on their website)


Ingredients

1 tri-tip, prepared according to your favorite recipe
2 cups red wine
1/2 pan drippings or stock (I used no-chicken stock)
1/3 cup finely chopped shallots
4 sprigs fresh rosemary
1/2 cup butter, cut into pieces
Salt and pepper

Bring wine, pan drippings/stock, shallots, and rosemary to a boil in a saucepan. Cook for 20 minutes or until reduced to about 1/2 cup. Remove rosemary and whisk in butter until melted. Season to taste with salt and pepper. Serve over prepared tri-tip, which in this case I marinated in a garlic herb mixture all day long and then barbecued. I used a Naked Chick'n cutlet for me to make it vegetarian.

* * * * *

Side dish... Butternut Squash with Wilted Spinach and Blue Cheese Vinaigrette (from Whole Foods "The Whole Deal" magazine)

Ingredients

1/4 cup blue cheese crumbles
3 tablespoons lemon juice
Salt and pepper
1 1/2 teaspoons extra virgin olive oil
1/2 small red onion, thinly sliced
1 5-oz package baby spinach
4 cups roasted 1" cubes butternut squash

To roast butternut squash, peel and chop into 1" cubes. Toss on a rimmed baking sheet with olive oil, salt, and pepper. Roast at 400° until tender and golden brown, about 30 minutes, tossing occasionally.

Use a fork to mash together blue cheese and lemon juice in a large bowl to make a thick, smooth dressing. Season with salt and pepper, and set aside.

Heat oil in a skillet over medium-high heat. Add onions, salt and pepper and cook, stirring occasionally, until golden brown, about 5 minutes. Add spinach and cook, tossing often, until slightly wilted and warm, 1 to 2 minutes more. Transfer to the bowl with the dressing, add the warm squash, season with salt and pepper, and toss to combine.

* * * * *

The squash was great, the red wine reduction was great (it reminded Chris of pot roast though, he likes a sharper red wine). And more importantly, it was hearty and gourmet-y and warming on a chilly fall evening. Even better was topping it off with my favorite chocolate cookies and coffee!